Friday, February 27, 2015

DIY Fabric Upholstered Twin Head board

Whats better than adding the headboard for a quick bedroom makeover?? This is another project which I did last year but it never made it to blog!!

DIY Girls Twin Headboard


One of my dear friends wanted to surprise her daughter with quick bed makeover. I happily agreed to help when she asked me. Little girl knew that we are up to something when we asked her to pickup the fabric. After a quick trip to Joann's, we came home with batting and the fabric. Picked up the plywood sheets we needed from the home depot. 

Here is the tutorial.

  • Cutout the template using the shopping bags 
 
  • Trace the design onto the plywood
  • Cut the plywood using the jigsaw.Since the width wasn't enough, we joined the two plywood sheets with the metal plates.

  • Cut the foam per the design
  • Glue the foam on to the wood using the glue spray
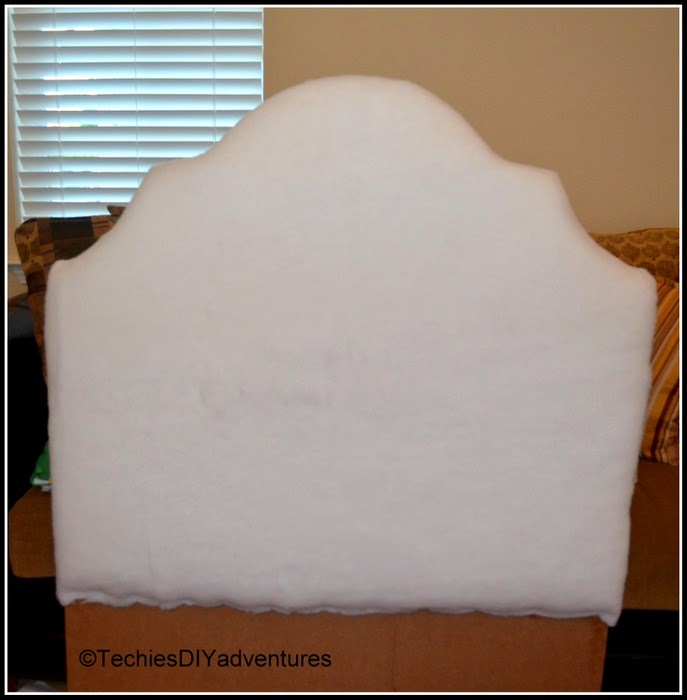
  • Staple the batting material on the top of the foam


  • Front view after the batting

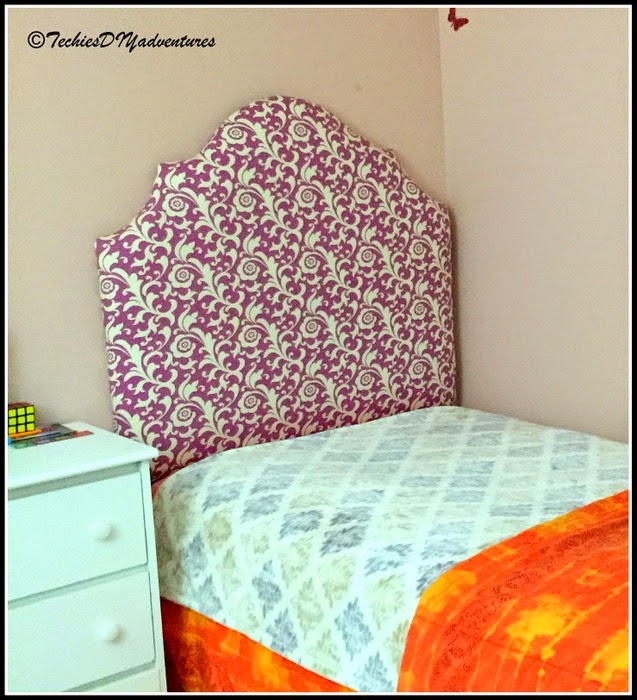
  •  Repeat above step with the fabric
DIY Upholstered Headboard

  • We used two D hooks to hang it on to Wall.
Upholstered Fabric Twin Headboard for Girls


Thank you for stopping by. Have a nice weekend!!

Sharing at :
thriftydecorchick   remodelaholic creativelylivingblog  modvintagelife  betweennapsontheporch  skiptomylou ishouldbemoppingthefloor  thededicatedhouse  boogieboardcottage  domestically-speaking   linda-coastalcharm    twelveoeightblog  karensuponthehill  homestoriesatoz   confessionsofaplateaddict  astrollthrulife    nap-timecreations    sugarbeecrafts   abowlfulloflemons  mabeyshemadeit  upcycledtreasures  savvysouthernstyle   simplydesigning   diybydesign justagirlandherblog    thediydreamer thehappyhousie frommyfrontporchtoyours  livelaughrowe  staceyembracingchange adelightsomelife  serenitynowblog    sewcando                                                                                   

Friday, February 20, 2015

Painted Fabric Upholstered Wing back chair (Pottery Barn knockoff)

I love wing back chairs as these are big, comfy, best place to curl up with a good book and nice music. I have been eyeing on this thatcher upholstered wingback chair from Pottery Barn to add to guest bed room for a while. Price tag always deterred me.

Source : Pottery Barn Thatcher upholstered wingback


Someone I know for a while, upgraded their family room furniture and were planning to get rid of beautiful wing back chairs. I picked up chairs, loaded these babies into our van and came home happily. They were in good shape, the fabric was little faded but no rips and best of all, these were FREE. I had two options, either upholster the chairs or paint the fabric. Since the fabric was in a good condition, I decided to paint the fabric. Yes, paint the fabric upholstery :)

This is how it looks today and how it looked before

Pottery Barn Thacther wingback Chair knock off

One more comparing with inspiration and my painted chair.

Pottery Barn Thacther wingback Chair knock off


I could wash the cushion cover and rest of the chair was cleaned per these details . There are plenty of tutorials in the blog world on how to paint the upholstery. I followed the instructions from this post from hypheninteriors.

Love the outcome. Hubby liked it so much that he wants the other chair also to be painted. I have other plans for that chair :)

Here are few photoes during the process.

First coat barely made any difference. I felt like I made terrible mistake, but decided to carry on. My little ones encouraging words kept me going.

Painted Upholstery

After the second coat. I started to like the way the chair looked.

Painted Upholstery


After final coat


I normally work on one project at a time and never start on the other before finishing. This project was an exception. It got pushed around so much. I had started this before summer vacation started, I am happy that its finally done.

Here it is in the Guest bedroom.


One more from the guest room...


Have you painted any fabric upholstery?

Sharing at :
betweennapsontheporch,    thededicatedhouse  creativelylivingblog  astrollthrulife  cedarhillfarmhouse   cupcakesandcrinoline myuncommonsliceofsuburbia  ladybug-blessings  nap-timecreations  abowlfulloflemons  mabeyshemadeit   vintagezest  sugarbeecrafts tipjunkie homestoriesatoz   brepurposed liverandomlysimple  upcycledtreasures  maisondepax savvysouthernstyle  averageinspired  nancherrow   thepinjunkie   frenchcountrycottage shabbynest  tidymom  impartinggrace    diyshowoff   serenitynowblog thecottagemarket  dearcreatives  dimplesandtangles   tatertotsandjello  bloominghomestead  funkyjunkinteriors     reasonstoskipthehousework   piecedpastimes   interiorfrugalista  onemoretimeevents  denisedesigned   thriftydecorchick  remodelaholic                                                                                


Thursday, February 12, 2015

Wine Cork DIY Heart for valentine's day

Heyyyy,

How r u all, any big plans for valentine's day?? I love this month. Other than the obvious reason, this month also brings birthdays of two most important people in my life: Dad and hubby dear.

I am hoarder. One of many things I collect is wine corks. I had pinned

Materials Needed.
- Wine corks (You can get these from crafts store too)
- Heart Template
- Hot Glue Gun

All I did was to draw heart on a shopping bag free hand. Arranged wine corks o the line to see if I like the look. Finally glued them together with the hot glue.

Here it is in the Entry way. You can hang it up like wreath.


Wine cork heart Wreath

Wine cork heart Wreath


or just put it on the console table.

Wine cork heart Wreath

Wine cork heart Wreath

One close up of the heart :)


I love how few corks are darker than others giving a various shades of pink (or is it marsala?)

Do you have any plans for the long weekend. I have few incomplete projects awaiting final touches, I am hoping to finish them and also catch up on some ZZZZs

Have a wonderful day and Happy Weekend!!!


Sharing at :
serenitynowblog  shabbynest  tidymom  betweennapsontheporch                                                                                                                                                       


Code line 7 9 is for loading jQuery library. Remove this line if you’ve already loaded it somewhere else in your blog. Hint: If your blog has an image slider, carousel or something with fading effect running, chances are it is powered by jQuery. If this widget doesn’t work, the first thing you want to do is comment out or remove this line. To use your own button, replace the URL in line 3 with the direct link URL to the image. Make sure to keep the quotes. To reposition the button, replace