Yay!! We are on the 6th week of One Room Challenge which is the reveal week. I am so glad that I took the plunge and today we have a beautiful dining room. I just cant stop staring at this room.
Thanks to my family, all my readers and dear friends who followed me thru this entire process and encouraged me at every step. Special Thanks to a dear friend Anupama for amazing photographs.
Without further ado, here is the dining room in its fullest glory.
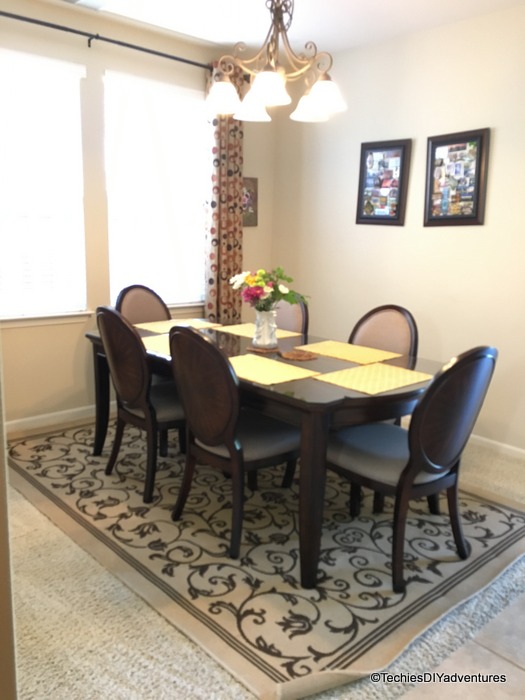
Here is where we were when this beautiful journey started.
View 1
View 2
Now, here is the after.
This post is photoes heavy :)
Subway wall art came out beautiful with one major hiccup right before the installation, my prince charming came to help this damsel in distress :). Now it looks amazing
The fabric which set the mood for the color scheme of the room
Map wall art with a twist. The twist is that it is totally magnetic. This was one of the must haves for the room, dear hubby is super duper happy that he can add many more to his magnetic frames collection.
Runner with tassels
Before leaving here is a beautiful shot of the room.
If you want to catch up what has happened in the earlier weeks, check these out
Week 1 Dining Room Before
Week 2 Design Plans and Inspirations
Week 3 Progress
Week 4 Paint, Stencil and Stencil
Week 5 So much to do so little time
Sources :
Console Table - Craigslist
Console Table Top - DIY
Fabric for the runner and Chair back - Amazon
Map - art.com
Magnetic Map Wall Art - DIY
Runner with the tassles - DIY
Dining Table Runner - DIY
Subway pelmet - DIY
Vinyl letters for Pelmet - Amazon
Paint Color - Glidden's Ripe Apricot color matched in Behr
Napkin Rings - DIY
Stencil - Etsy
Curtains - DIY (Table covers from HomeGoods)
Wine Rack - Cost Plus
Lamp - Costco (borrowed from Guest Bedroom)
Will come back with the tutorials soon. I am off to calling it home to check out how did other amazing bloggers transformed their room.
Sharing at:
thededicatedhouse too-much-time tatertotsandjello betweennapsontheporch
Thanks to my family, all my readers and dear friends who followed me thru this entire process and encouraged me at every step. Special Thanks to a dear friend Anupama for amazing photographs.
Without further ado, here is the dining room in its fullest glory.
Here is where we were when this beautiful journey started.
View 1
View 2
Now, here is the after.
This post is photoes heavy :)
The fabric which set the mood for the color scheme of the room
Map wall art with a twist. The twist is that it is totally magnetic. This was one of the must haves for the room, dear hubby is super duper happy that he can add many more to his magnetic frames collection.
Runner with tassels
Before leaving here is a beautiful shot of the room.
If you want to catch up what has happened in the earlier weeks, check these out
Week 1 Dining Room Before
Week 2 Design Plans and Inspirations
Week 3 Progress
Week 4 Paint, Stencil and Stencil
Week 5 So much to do so little time
Sources :
Console Table - Craigslist
Console Table Top - DIY
Fabric for the runner and Chair back - Amazon
Map - art.com
Magnetic Map Wall Art - DIY
Runner with the tassles - DIY
Dining Table Runner - DIY
Subway pelmet - DIY
Vinyl letters for Pelmet - Amazon
Paint Color - Glidden's Ripe Apricot color matched in Behr
Napkin Rings - DIY
Stencil - Etsy
Curtains - DIY (Table covers from HomeGoods)
Wine Rack - Cost Plus
Lamp - Costco (borrowed from Guest Bedroom)
Will come back with the tutorials soon. I am off to calling it home to check out how did other amazing bloggers transformed their room.
Sharing at:
thededicatedhouse too-much-time tatertotsandjello betweennapsontheporch


