Monday, December 21, 2015

DIY Spoon Handle Star Ornaments

Welcome to the tutorial on spoon handle star ornaments.

Last week I shared the tutorial on table top Christmas tree using the spoons. I just used the front part of the spoon for the tree and saved the handles to put them to good use.  Little glue and some spray paint turned these into beautiful Star Ornaments.

I just hot glued the spoon handles using hot glue.


Spray painted them.


Also hot glued some yarn to put it on the tree.


Voila, spoon handle star ornaments ready to be put on the tree


Isn't this a simplest project?

Thanks for checking it out


Wednesday, December 16, 2015

DIY Spoon Christmas Tree

Here is another Christmas tree in the series of DIY Trees.

What's better  than the tree made with spoons to adorn the dining table. Yes, with plastic spoons.

DIY Spoon Christmas Tree


Materials :

Styrofoam Cone
Clear Plastic spoons ( I used 110 ) from dollar tree.
Hot glue
Spray Paint.

Procedure:

-- Cut out the tail of the spoon. I was able to snap it with my fingers as the spoons were very flimsy. You can use scissors
-- Spray Paint the cone and spoons in gold. I didn't paint the back side of the spoons.


-- Start Gluing


DIY Christmas Tree Using Spoons

-- Top it off with a ribbon and the ornament.
DIY Christmas Tree


Here it is with other two trees
Christmas Tree DIY

Which one is your favorite in these three trees? Mine is the fabric one.

Sharing at:
betweennapsontheporch

Thank you for stopping by


Thursday, December 10, 2015

Fabric Christmas Tree

Hi,

I am back with the second tutorial for the DIY Christmas Tree, this time using remnant fabric)

Remember my dual tone fabric dresser. Since I wanted to align the design, I was left with few long pieces of this fabric. I used the left over fabric for the Christmas tree.

Materials Needed
- Cone (I made using poster board, I ended up with 4 different size cones for $1, yay!!! )
- Strips of fabric or burlap ribbon)
- Scissor
- Hot Glue gun

Procedure :
- Seal the ends of the fabric with the hot glue and start making the small cuts vertically. (dont flatten the fabric, the loops at the end add volume to the tree)


- Hot Glue the fabric to the cone.

- Keep repeating above steps till you reach the top :)


You have the beautiful tree ready. If you want, you can embellish the tree with tiny beads/jewels or leave it as is.


Isnt it pretty? Thank you for stopping by.


Wednesday, December 9, 2015

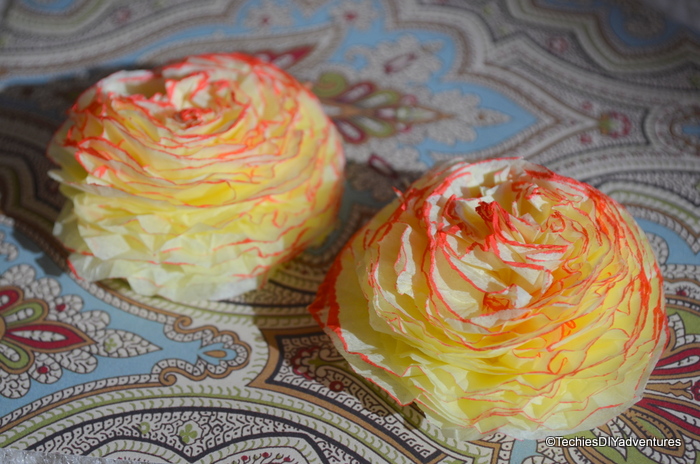
Paper Flower (Carnations) using Crepe Paper

Hi All, I am back again with another tutorial. This time for paper carnations using crepe paper.

You saw the crepe flowers I had made with the help of my kids during Deepavali Post.

I had picked up these crepe papers from the dollar store to stuff it in the gift bags. Bright Orange or bright yellow would have been more colorful but I went with what I had with me.

Here is how the flowers were made.

1. Take out the sheet, and fold it few times.

2. Draw a circle on the top and cut the circles (I had 16 layers for each flower in two different sizes)

3. Staple in the middle so that two staples looks like plus sign


4. Starting with middle layer, start crumbling paper for every layer.


5. Once all the layers are done, fluff it up and you have beautiful carnations ready.


We colored the edges with sharpie for the double colored flowers.

I used these flowers in my Diwali decor.


After the festival, they adorned my coffee table in a copper bowl :)


Stay tuned, I have few more christmas tree and ornament tutorials coming up. Hoping to pen them down soon, its little crazy around here :)

Thanks for stopping by,


Thursday, December 3, 2015

DIY Origami Christmas Tree

Hey All!! How was your Thanks giving break? We had a very relaxing break as we didn't do much other than socializing. During the break we (me and mini me) tried to make few Ornaments and Christmas trees.

Today is the first tutorial in the series of 5 DIY Christmas Trees we crafted during the break.

My little one has new found interest in Origami, this tree was an attempt to make Origami with her :) All that you need for this project is a square paper and scissor.

I will try my best to explain, hopefully photo helps where words fail.

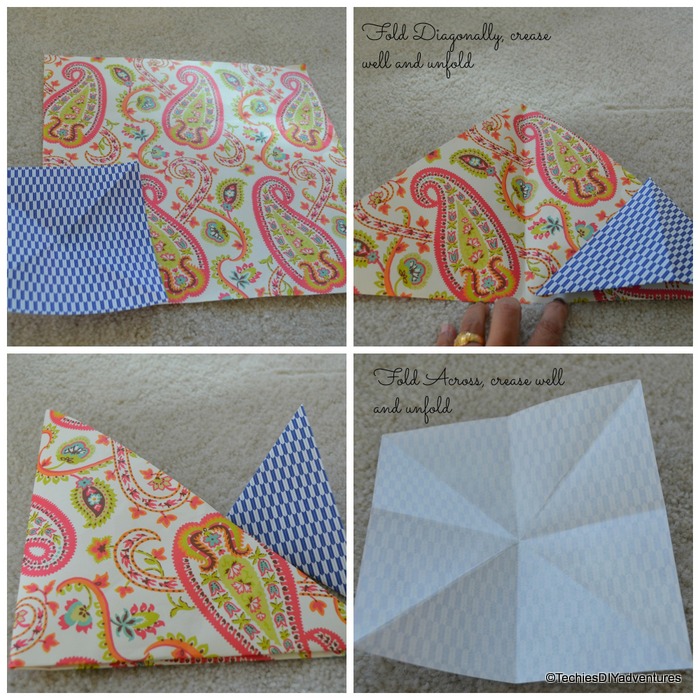
Step 1 :- Fold the paper diagonally (corner to corner on both side), crease well and unfold.
Fold the paper across, crease well and unfold.


Step 2 :- Using creases push two corners inside to make a flat square base.


Step 3: Fold the uppermost outer flaps in, to meet the center line and crease well. Make sure open end is at the bottom. Repeat the same on the other side.


Step 4: This is a little tricky Step.  Open the Flaps, Push the Corner inside so that each Flap ends up into two flaps.


Step 5:  Chop off the bottom Triangle to make it a proper triangle.


Step 6 : using scissor, make slits on either sides.


Step 7 : Fold The individual Cuts in to small Triangles on all 8 sides and you have beautiful Origami Tree ready.


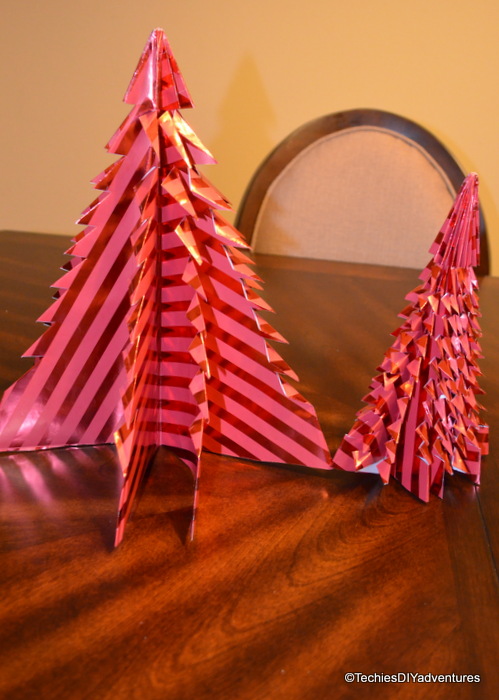
One more group picture :)


I couldn't stop at three :) I wanted a little tall one, so tried one with wrapping paper. Loved the red tree but it was too wide.

so, instead of stopping at the last step as mentioned above, I repeated the step 7 for every side. That gives you 16 arms instead of 8.


And one more group Pic :)


Sharing at : thriftydecorchick betweennapsontheporch

Stay tuned for the next tree!!

Thanks for stopping by.


Code line 7 9 is for loading jQuery library. Remove this line if you’ve already loaded it somewhere else in your blog. Hint: If your blog has an image slider, carousel or something with fading effect running, chances are it is powered by jQuery. If this widget doesn’t work, the first thing you want to do is comment out or remove this line. To use your own button, replace the URL in line 3 with the direct link URL to the image. Make sure to keep the quotes. To reposition the button, replace