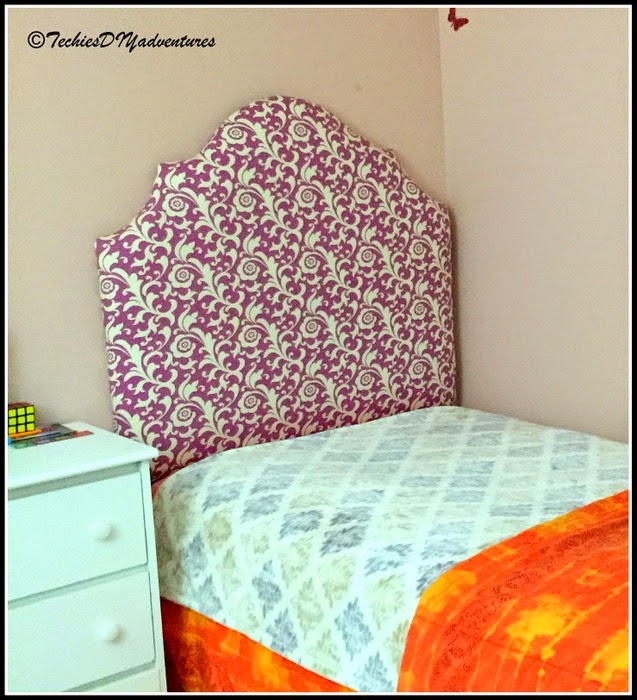
Whats better than adding the headboard for a quick bedroom makeover?? This is another project which I did last year but it never made it to blog!!
One of my dear friends wanted to surprise her daughter with quick bed makeover. I happily agreed to help when she asked me. Little girl knew that we are up to something when we asked her to pickup the fabric. After a quick trip to Joann's, we came home with batting and the fabric. Picked up the plywood sheets we needed from the home depot.
Here is the tutorial.
- Cutout the template using the shopping bags
- Trace the design onto the plywood
- Cut the plywood using the jigsaw.Since the width wasn't enough, we joined the two plywood sheets with the metal plates.
- Cut the foam per the design
- Glue the foam on to the wood using the glue spray
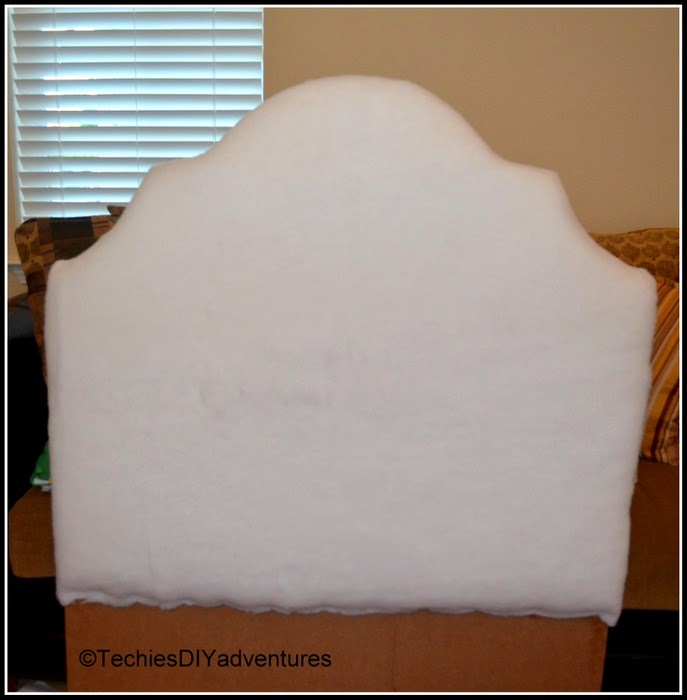
- Staple the batting material on the top of the foam
- Front view after the batting
- Repeat above step with the fabric
Thank you for stopping by. Have a nice weekend!!
Sharing at :
thriftydecorchick remodelaholic creativelylivingblog modvintagelife betweennapsontheporch skiptomylou ishouldbemoppingthefloor thededicatedhouse boogieboardcottage domestically-speaking linda-coastalcharm twelveoeightblog karensuponthehill homestoriesatoz confessionsofaplateaddict astrollthrulife nap-timecreations sugarbeecrafts abowlfulloflemons mabeyshemadeit upcycledtreasures savvysouthernstyle simplydesigning diybydesign justagirlandherblog thediydreamer thehappyhousie frommyfrontporchtoyours livelaughrowe staceyembracingchange adelightsomelife serenitynowblog sewcando


Bharati, Love the shape of the headboard. The fabric print and color is pretty.
ReplyDeleteThank u Reshma. Have a great week ahead!
DeleteLove that fabric! It looks really great!
ReplyDeleteI would love for you to stop by my blog and join our Something to Talk About link party!
Have a great day!
Karen
Thank you Karen!! off to party with you :)
DeleteGreat job. I so agree with you - more ingenuity, less spending.
ReplyDeleteThank you Susan
DeleteSuper cute!
ReplyDeleteThank you Diana
DeleteExcellent job Bharti.
ReplyDeleteThank u, SweetLadySutton
DeleteSo pretty, I love that fabric! Thanks for sharing this at On Display Thursday this week :)
ReplyDeleteThank u Emily. Fabric was little girl's choice. Thanks for hosting!
DeleteVery pretty. I love that fabric.
ReplyDeleteThank u Trish. I love that fabric too :)
DeleteWow--that looks great You did a wonderful job (and make it look so easy!). Thanks for sharing at the Pretty Preppy Party!
ReplyDeleteThank u so much Amy :) Thanks for hosting too.
DeleteWhat a great tutorial. So cute. I have featured it at my DIYbyDesign link party going on right now. Please stop by and pick up an I've Been Featured button. Thanks. http://diybydesign.blogspot.com
ReplyDeleteThank you so much for the feature, love partying with you :) Have a great day and an awesome week ahead!
DeleteThis comment has been removed by the author.
ReplyDeleteThis comment has been removed by the author.
ReplyDeleteLooks great! Thank you for sharing your post with us at Totally Terrific Tuesday Link Party. If you haven't linked up this week, be sure to stop by. The party is still going on! Enjoy the rest of your week!
ReplyDeleteChristie ~ Sparkles of Sunshine
Thank you for stopping by and hosting Christie
DeleteCongratulations! This recipe is featured over at Diana Rambles today and has been pinned in the Featured at Diana Rambles board at Pinterest and Tweeted. Please grab a featured button off my button page or via the post guidelines graphic. Thanks for sharing this awesome idea!
ReplyDeleteThank u Diana. Its always a pressure to party with u.
Delete